Updated September 5, 2024
Mappedin is the easiest way for anyone to start mapping the indoors. With its easy-to-use interface and tools, you can go from a paper floor plan to an interactive 3D map in minutes. Recently, we held a webinar, sharing the origins of the product and some amazing tips and tricks for anyone to use to streamline their workflow.
Here are some useful tips and tricks straight from our indoor mapping experts:
Tips and tricks
Copy geometry to other levels
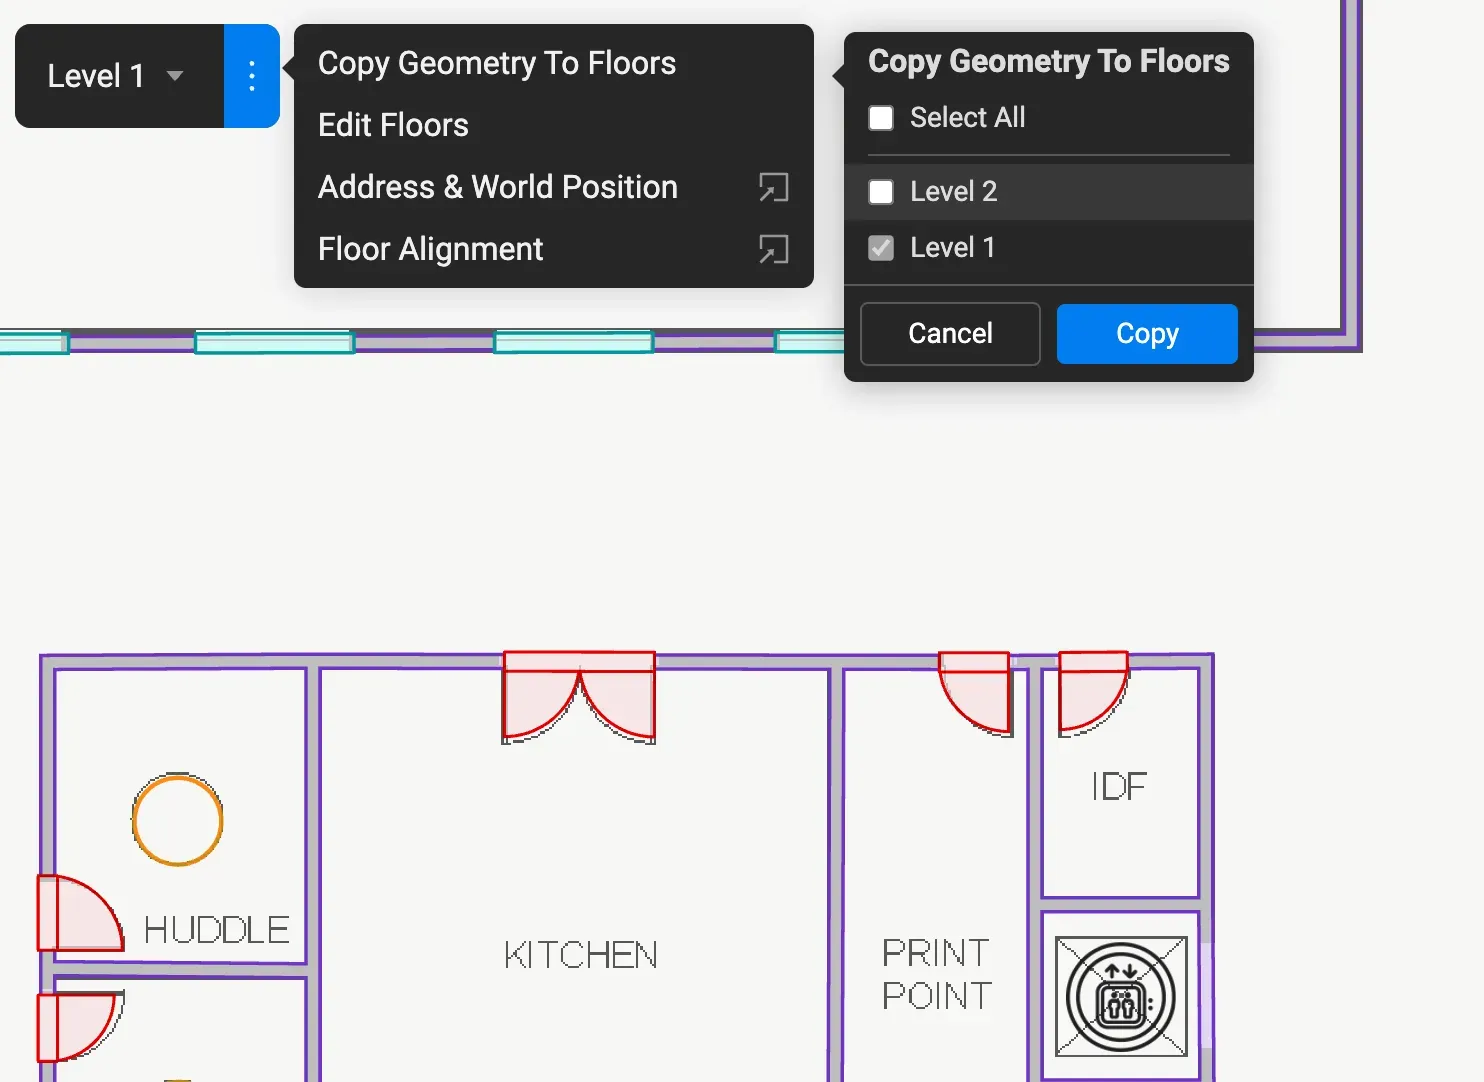
Indoor spaces can change rapidly and can vary from floor to floor, which is why you can add additional floors after creating the first one. In the level selector, click the menu on the right side of the button to see options to edit venue details and geometry. To save time, you can copy the geometry to any applicable floor within a building.
Ensure a closed space for connections
Connections can easily be copied to all floors by placing the connection icon within the space and defining the floor span within the connection details window. Pro tip: the space must be enclosed for this feature to work. You can check if a space is enclosed by selecting it and ensuring the highlighted space is defined by the vertices and polylines.

Map automation
Choose the level of automation you would like to use when mapping your venue. AutoMap gives you the ability to digitize your floor plan almost instantly (it’s basically AI magic!). With AI-powered tools, you can quickly produce a vectorized floor plan by drawing doors, walls, and desks. As you draw, the AI-powered tools automatically detect doors and windows and place them appropriately on the map.
Merge vertices
Clean up any rouge walls by merging vertices together with a simple drag to the vertex you are merging with. This feature can be useful for walls that don’t quite meet to make a complete room.
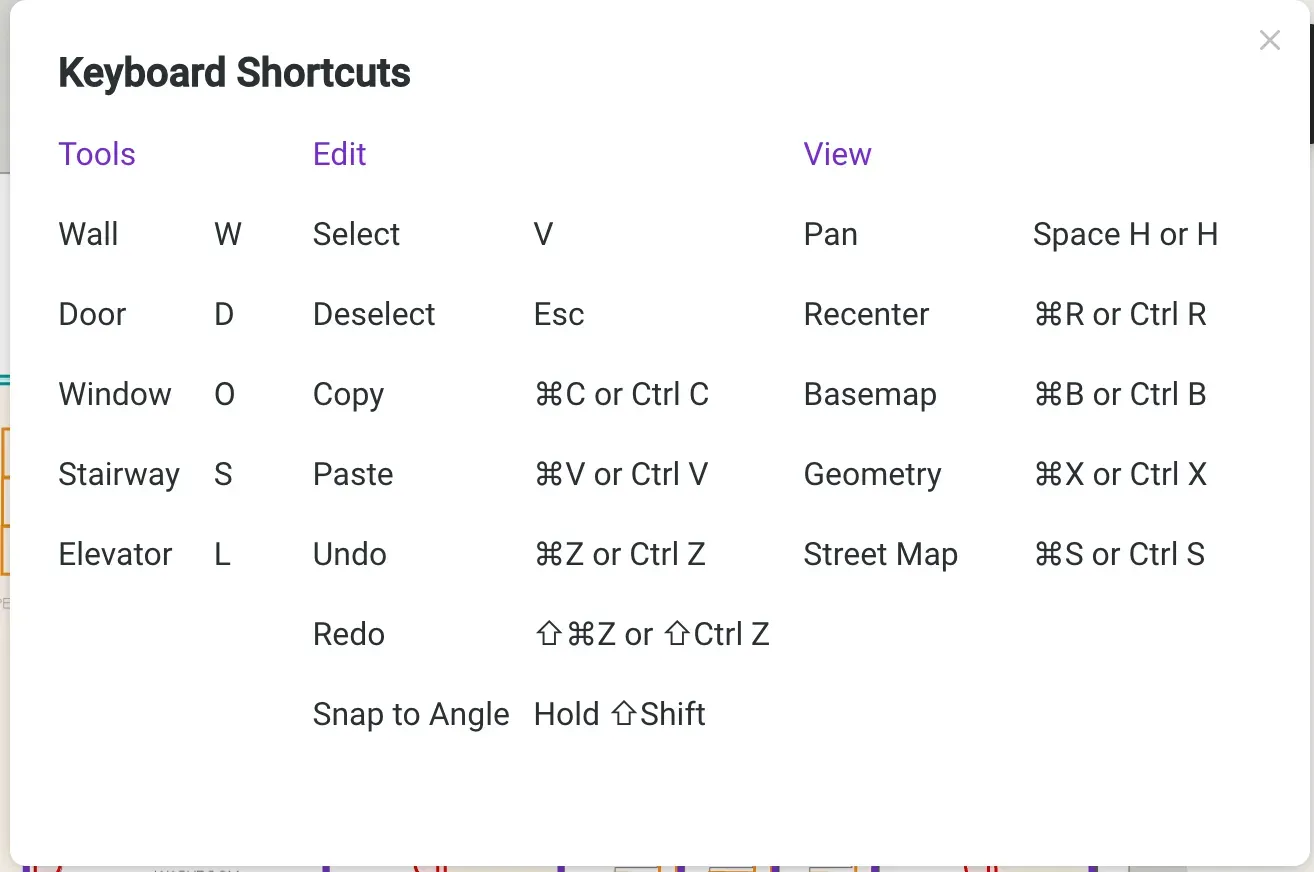
Keyboard shortcuts
There are a number of keyboard shortcuts to help you save time and switch between or access tools faster. Start with a simple copy and paste shortcut to more useful shortcuts, such as holding the Shift key while drawing walls to see guides for 0, 45, and 90-degree angles. Easily access this list any time by clicking the Help button at the bottom right corner of the application window.
Multi-select objects
Hold the Shift key while selecting multiple objects to move, delete, or copy. Save time in your mapping processes by selecting a group of objects and simply use copy and paste to quickly add repeated objects (such as desks) to your map. When you copy and paste, a preview of your copy selection will be visible and retained until you press the Esc key or click the Selection tool.
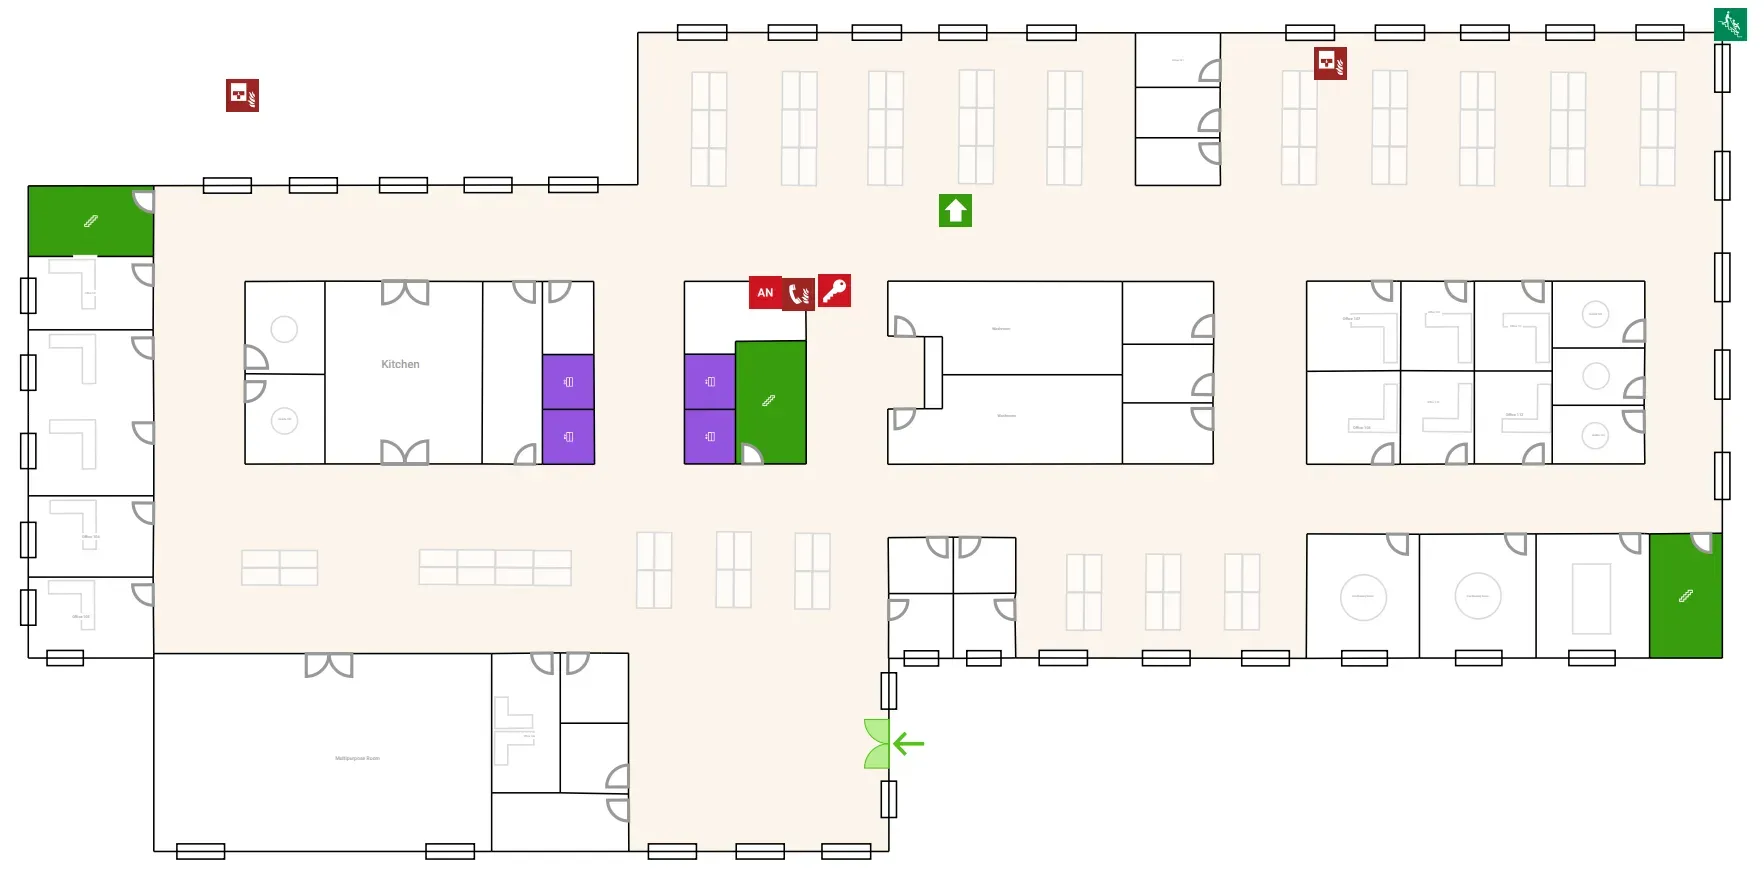
Organize with space types and labels
There are three distinct space types available: room, hallway, and open to below. Each type is visually represented on a 3D map in a unique way. Rooms, which encompass any enclosed space, are depicted with a light gray floor. Hallways, designed to connect room spaces, appear as white on the map. Open to below spaces, found on above-ground level maps, represent voids or floor openings revealing lower floors, and are marked with a hatched pattern, typically encountered in larger spaces such as malls.
In addition to visual representation, all spaces, connections, and objects can be labeled, and these labels will appear on the map as interactive floating labels.
The PDF export further enhances clarity by assigning different colors to these spaces, aiding users in easily identifying the type of space, as well as crucial locations such as connections and entrances.
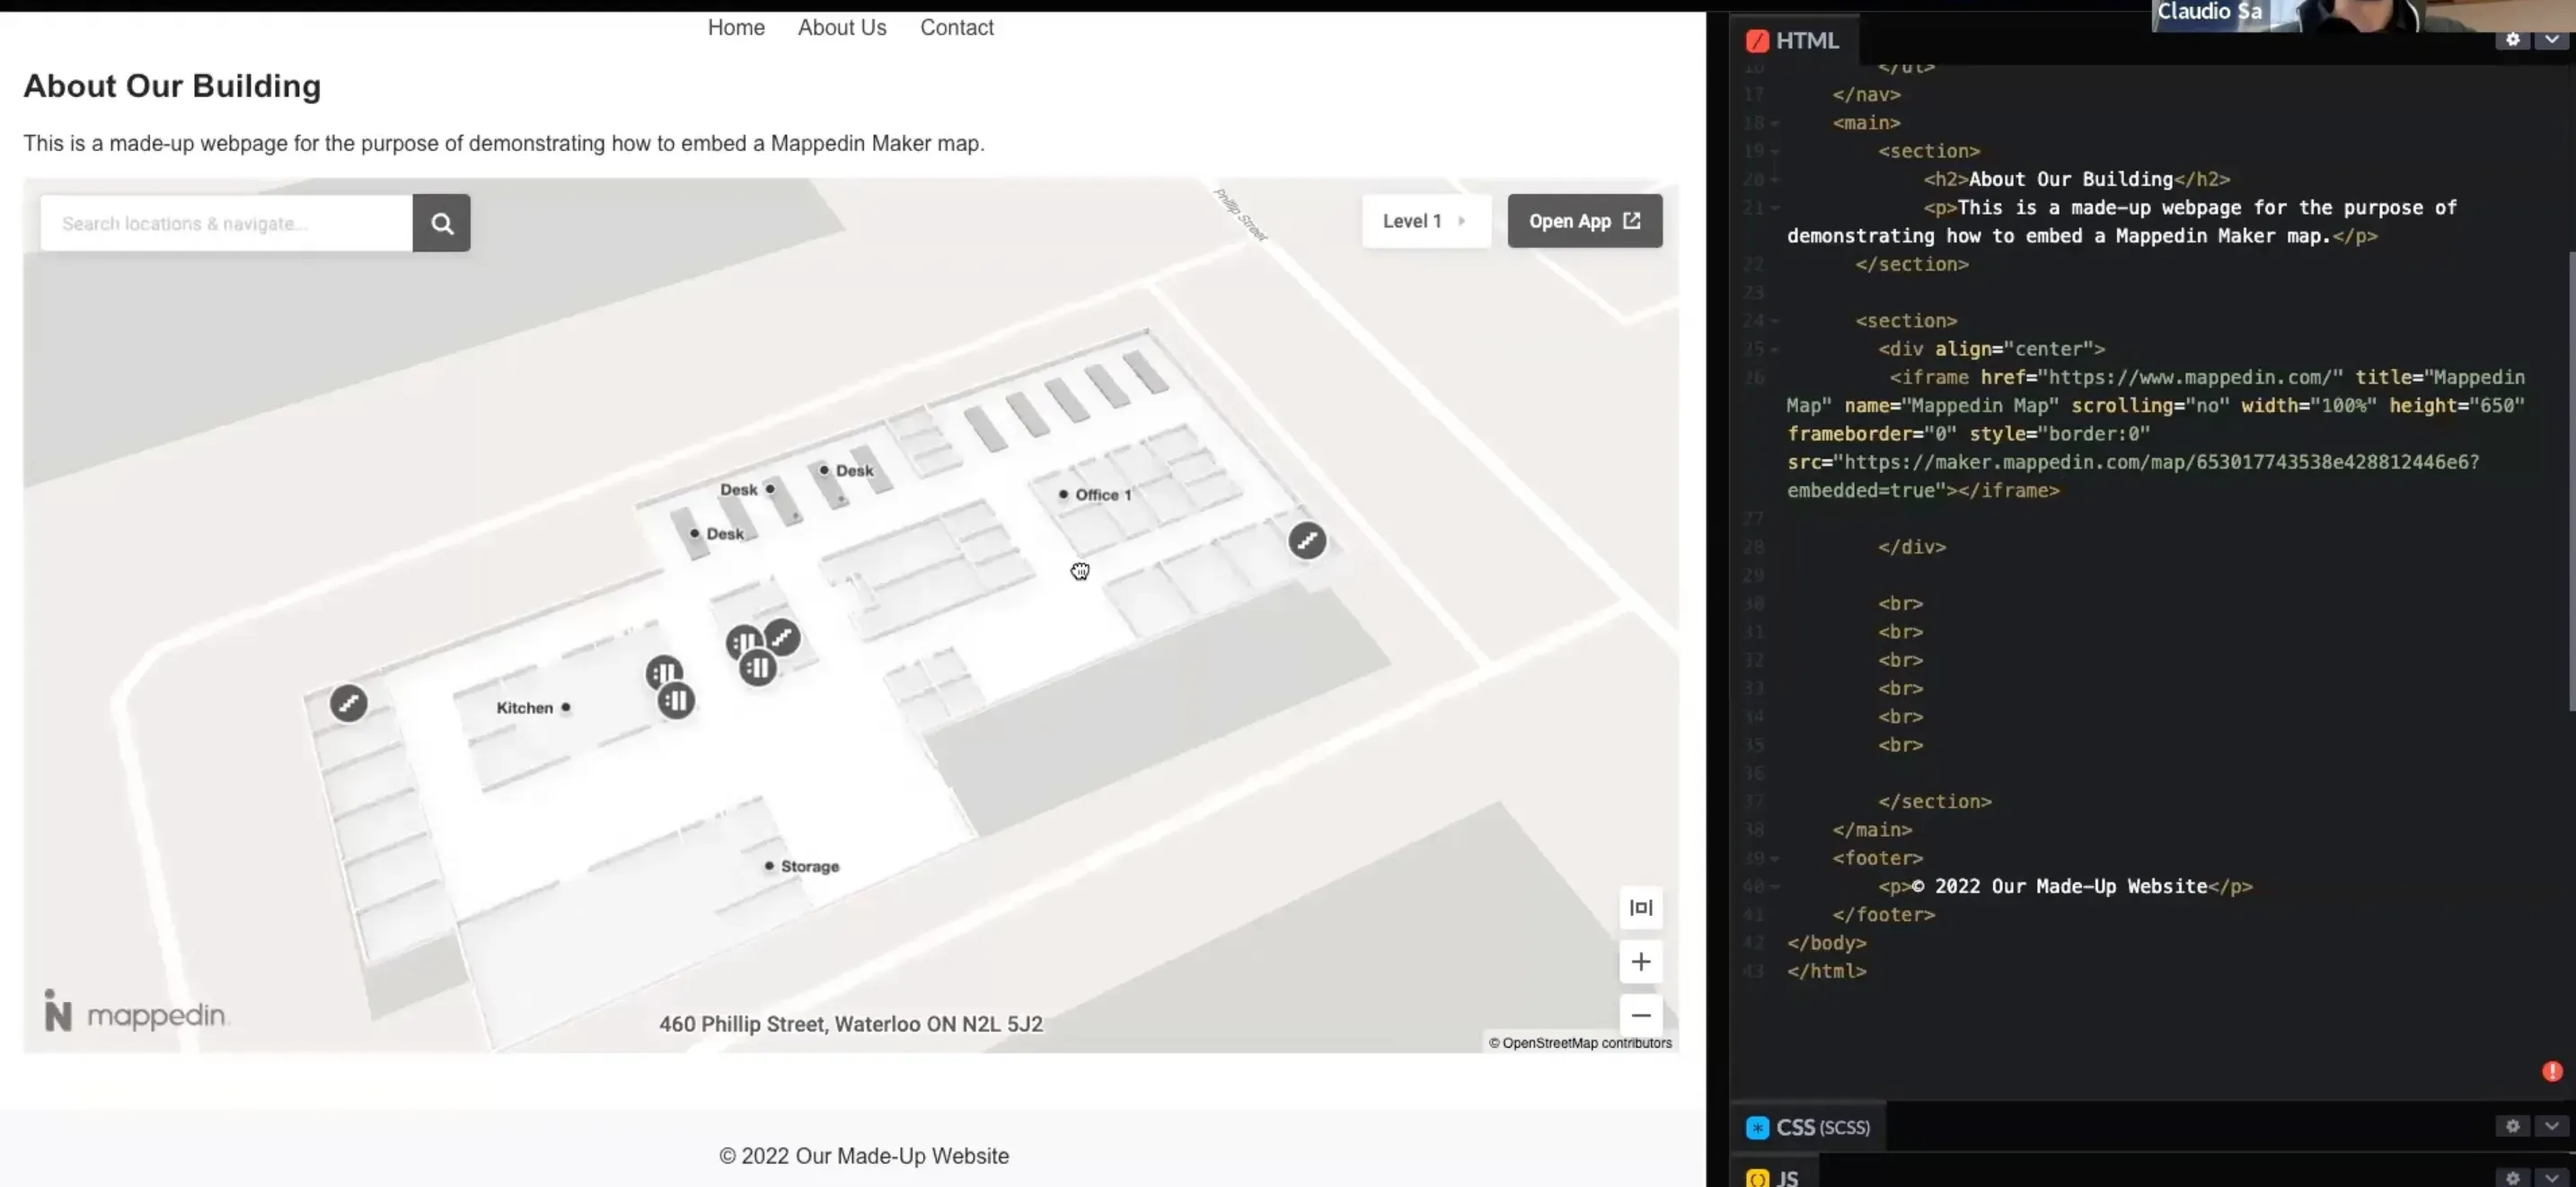
Embed a Mappedin map into a webpage
Mappedin allows you to easily share your map with others. To embed it on a website, first click the Preview button. On the 3D map, click the Share button and click Copy Embed to copy the code snippet. Go to your website’s page or HTML editor and paste the code snippet! With only a few lines of code, you can have an interactive wayfinding map on your website!
Mappedin is free for anyone to sign up and use. Your stories, experiences, and insights serve as catalysts for our innovation. Feedback is always welcome, you can reach out to talk to our team here.
Share