Mappedin’s Map Editor tools are perfect for keeping floor plans up to date and accurate with changes that occur indoors. Using Blue Dot, users can pinpoint themselves on the map and easily navigate complex rooms and corridors. The freedom to view an entire map on your mobile device and wayfind to any location provides huge benefits to indoor safety and security.
For security personnel, indoor maps can vastly improve effectiveness. With an integrated map dashboard, teams can adequately plan and execute floor coverage and staffing, respond and track down incidents, and monitor officer safety with precise geopositioning. Using Mappedin’s tools, all employees can be confident that they’ve got the most up to date map and context for the job.
Let’s discover how you could create a map dashboard to monitor the safety and security of your officers as they patrol their routes. The following CodeSandbox preview demonstrates using pseudo-location data to simulate an officer’s live location. Click anywhere to trigger an alert and have the nearest officer navigate to it. The full source code for this demo is available here.
The demo above was built using Mappedin’s Web SDK. In Mappedin Web SDK v5.7.0, support was added for animated Markers along with a brand new Marker API. You can read about all these new features in our Markers guide on the Developer Portal. In this blog post, we will use this feature to animate the latitude and longitude changes of the security officers to track their position on the dashboard.
Setting up the map
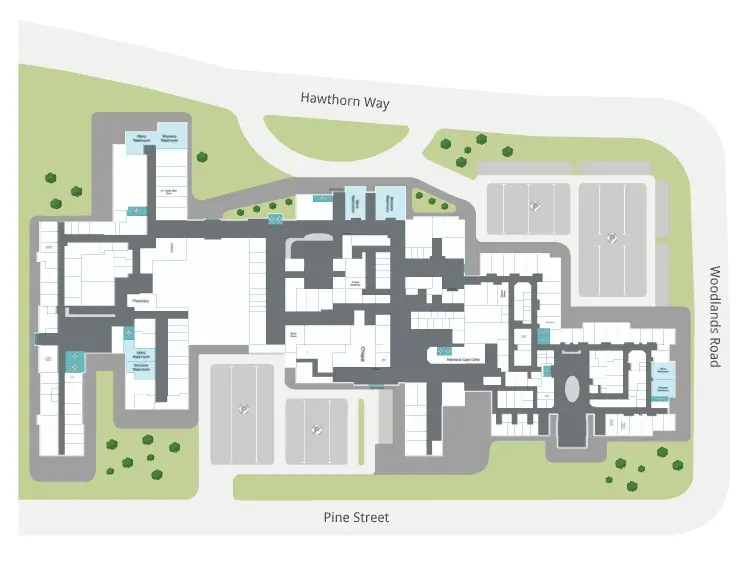
We'll begin with a basic app which is already configured to render the Mappedin Demo Hospital. If you haven’t yet started with Mappedin’s Web SDK, read our Getting Started guide on the Developer Portal which introduces the basics of rendering a map view.
In dashboard applications like these, we want to see as much of the map as possible and prevent 3D objects from obstructing our view. We can do this by tilting the camera so we look at the map from the top down. We can also set the maxTilt so that users can’t accidentally adjust the camera with touch or mouse input.
Let's also apply Flat Labels to all the locations. Flat Labels are painted directly onto the polygons and face upward toward the camera at all times. This is perfect for the dashboard as Flat Labels don't collide with Markers and won't hide as an animated Marker moves past them.
With the camera and labels configured, our venue looks perfect for monitoring personnel and security related events.
Rendering officers’ live locations
To get your security personnel's live location, you will require some sort of tracking beacon or device for each officer. Fortunately, the Mappedin Web SDK is completely platform agnostic and will take location data from any device as long as it is in the form of a latitude / longitude coordinate.
Upon receiving the first position update from your tracker, you may create a Marker to represent the officer on the map. Markers must be attached to a MappedinCoordinate or MappedinNode. In the snippet below, we use the latitude and longitude values to get our nearest node on the map. We then pass that node to our Markers.add() function along with a template string containing arbitrary HTML.
This Marker will render a floating div with a class of marker. We can target it with CSS and give the Marker the appearance of an officer's pin on the map.
The CSS attached to this Marker will create an element similar in appearance to the Blue Dot to denote a security officer’s location on the map.
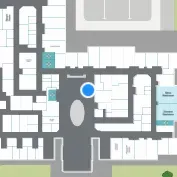
Once we've created our security officer at their first detected location, we can store their Marker for later use. Each position update we receive from our Indoor Positioning System (IPS) must be attached to a tracking ID which determines the officer whose location changed. Using a hash map and an encapsulating Officer class, we can easily store each officer's Marker by their tracking ID for quick lookup.
When we receive a new coordinate, we can retrieve the Marker associated with it using the tracking ID. Then, we can use Markers.animate() to update the officer's location on the dashboard with a smooth animation. Setting the animation easing to CAMERA_EASING_MODE.LINEAR removes the acceleration and deceleration defaults from the Marker animation.
Triggering alerts
At this point, you should have a dashboard which displays the live location of security personnel as they navigate through the facility. This is great for monitoring officer safety and ensuring good floor coverage, but what about when an incident does occur. Which officer should respond?
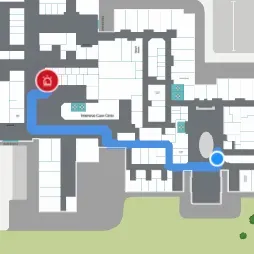
Let's add the ability to trigger an alert on the map. We'll use a Marker just like the officers, but we'll attach an alarm icon and pulsing animation to draw attention to it. Additionally, set the rank to COLLISION_RANKING_TIERS.ALWAYS_VISIBLE to prevent the alert from disappearing when it collides with another Marker.
Include the following CSS to style and animate the alert. The images are Scalable Vector Graphics (SVG)s, which can be downloaded from the CodeSandbox demo included with this post.
Next, we can use the click event we just added to determine the nearest officer and draw a path from their location to the alert.
In your implementation, you may want to send out a notification to the officer associated with the tracking ID to have them respond accordingly.
We can also attach a click event to the alert to remove it from the map and do any other functionality we desire. To do this, access the contentEl property of our alert Marker. This property gives us direct control over the div which we created in the template string. With it we can do any standard JavaScript, such as adding an onclick function.
There you have it. The map dashboard should now live update officer locations as they're detected. When a supervisor clicks on the map, an alert will be created and a path from the nearest officer will be drawn. Upon clicking the alert, the path will disappear and the officer can return to their regular route.
In the CodeSandbox demo provided we simulated all these location updates, but in the real world this data would be supplied via an Indoor Positioning Service (IPS) provider. We recently wrote about how Apple’s Core Location services can seamlessly enable Blue Dot on your map, without requiring external IPS vendors.
If you're interested in building more with Mappedin's SDKs, have a look at our Developer Portal. Additionally, don't hesitate to reach out to one of our representatives with any questions about using Mappedin's tools for your use case.
Share